
|
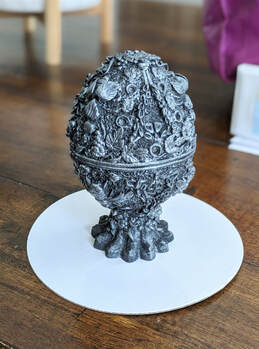
If you are into cakes and cookies, you know about paint powders, petals, and luster dust. My go to liquid is cheap vodka but I needed a different solution for the gingerbread. When I first started experimenting with painting on the (new to me) material, paint powders were cracking with vodka once the alcohol evaporated and dried. At my first gingerbread class, someone mentioned Sugar Art's Color Solution.  I can not praise this stuff enough. It is a mix of grain alcohol and glycerin so it paints on smoother and somehow makes the colors even more intense. This solution was a must for me when it came to the pure white and pure black powders. Most of my pieces I would do a quick white wash and then slowly add on the color. You can still layer and blend just like regular paint to achieve your highlights and shadows.
A quick spray of PME, a edible lacquer glaze, helps keep colors in place as you layer on or if you have stubborn colors that want to bleed like the dark blue.
The PME was two-fold for us as it helped create that shiny "this is a collectible" porcelain glow we wanted as well.
0 Comments
When it comes to Nationals, you can start with a non-edible base like wood. But everything that is applied to the base and above...has to be edible. We knew going into this piece that we wanted our display to look like an old carved cupcake stand. We started with a round piece of scrap wood measured out to 22 inches in diameter. Rules state that you can not exceed 24 inches so we wanted to be cautious with any border we added. I started rolling out Grier's construction grade gingerbread to cover the top. I used a metal ruler to make deep notches and then took clay tools and knives to make smaller scratches in between the grooves. I allowed the gingerbread to air dry for a good 2 weeks and then you can sand to smooth out any uneven sections that may have popped up drying. 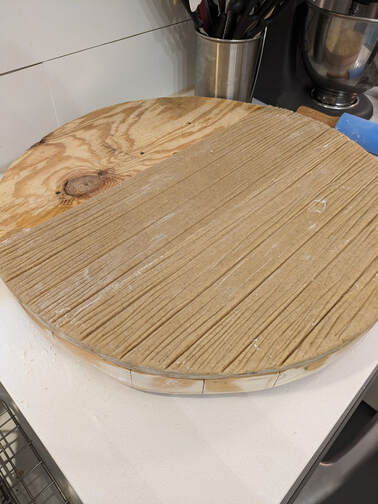 I wrapped the edges in long strips of the same gingerbread dough. Allowed it to air dry and patched any seams with gingerclay. The next step was to add our entry number with edible tylose glue and figure out what border we wanted. 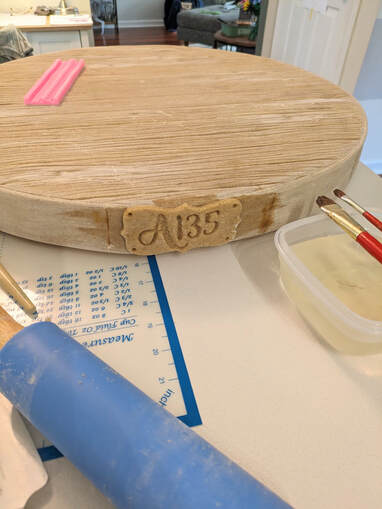
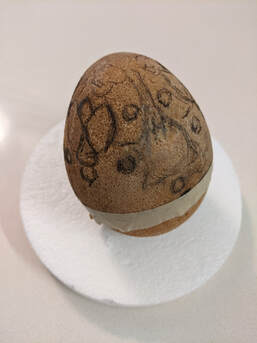
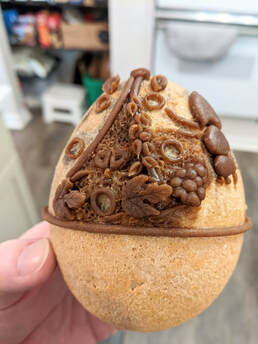
We tried a few different silicon molds but decided to double up on the twisted border we loved. I combined gingerclay and white fondant to create the pieces around the edges. Straight gingerclay didn't bend as well as needed in long strips. The addition of fondant helped provide a little more elasticity so there was no breakage in bending the pieces. All the molded pieces were attached using tylose glue which dries in a few hours. The gingerbread/ fondant-clay mix itself will take a few weeks to air dry. I did take the opportunity, once the molding was dry, was to repair any patches or holes. I did this by taking a small amount of fondant-clay mix and adding hot water. It helps to create a "gunge". It dries quickly and remains the color of the fondant used. Once the entire piece is dry, you can paint. I used petal dust, cocoa powder, and vodka to create different "stains". 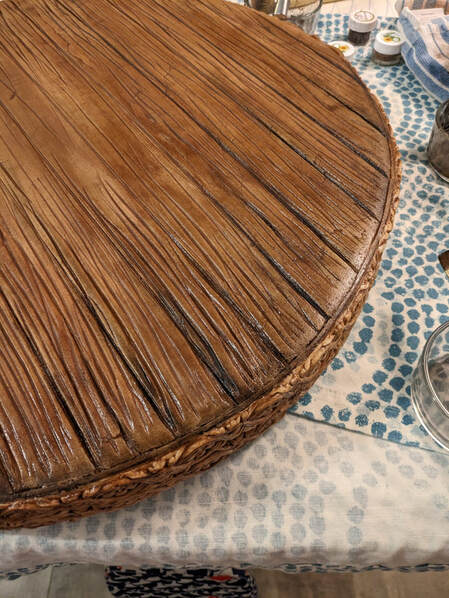 Besides a house and cookie here and there of course. I knew how to bake. I knew the term "tylose". And I knew the craziness I was about to encounter. At least I thought I did. My friend, Grier Rubeling at The Craft Crib, tried to warn me. With a hundred questions to her and answers under my belt, I went in with our first faberge egg we wanted to design for our national piece. First step was baking her "construction grade" gingerbread in egg molds. I can post recipes soon or you can head to her blog linked above! 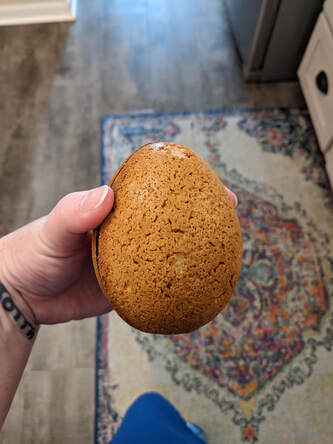 The egg molds were in 2 pieces so the next step was to "glue" the pieces together with Tylose glue and fill the gap with gingerbread. You can use sand paper to smooth out the edges once dry. 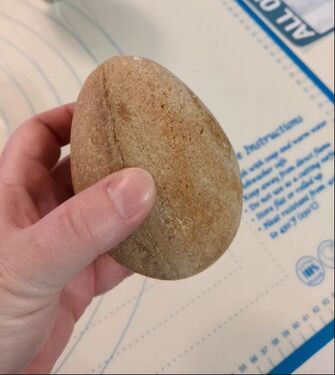 In order to get anything close to our inspiration piece below, I needed to learn about ginger "clay" next. This is a moldable dough made from crushed ginger snaps and other ingredients. 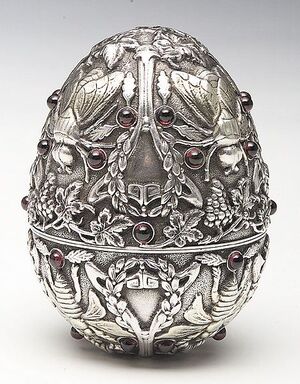 I sketched on the egg really quickly to get placement and set out with the small details.
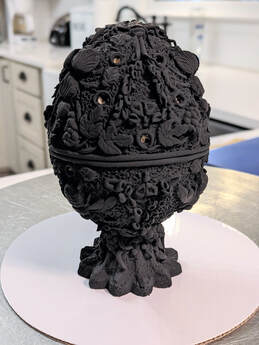
The gingerclay does take a little bit to dry but I was so thrilled with it. I used a set of clay sculpting tools and silicone molds to help with leaves, grapes, and parts of the insects. While the top was drying, I was able to drill a hole in the bottom of the egg and in the top of the base. The base was made from a candle silicon mold and baked gingerbread. A small cinnamon stick and tylose glue were used to secure the egg to the base. I gave it a solid week to dry just because I was nervous to touch it. But once it was secure, I brought the decoration down on the base just a bit to help hide the seam. 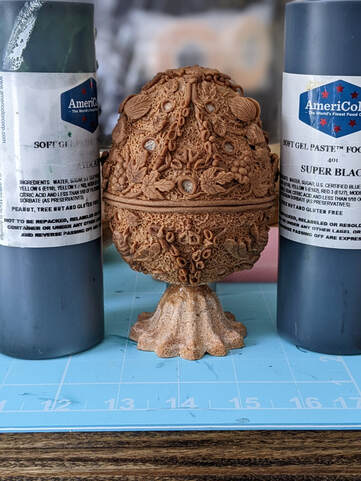 Painting was the last and most enjoyable step for me. I started by covering the egg and base entirely in Master Elite Black paint powder. You can use vodka to mix the color but I did fall in love with Master Elite's Color Solution during this project. Vodka tends to crack the paint if used in large doses. But the mixture of glycerin AND alcohol found in the Color Solution helped solve this problem. Once the black was completely dry, I dry brushed various silver lusters on to achieve a metallic pewter look.
Last step to the egg was to drill the spots in the rings and add some large sprinkles affixed with tylose glue.  |
AuthorI have a new obsession...gingerbread. Here I will share my new art form and all the fun it brings to my life. Archives
May 2024
Categories |


 RSS Feed
|
|